How to Create Chrome Nails at Home: Easy Step-by-Step Tutorial
Chrome nails are the ultimate statement in nail art, delivering a mesmerizing, mirror-like finish that’s perfect for any occasion, from casual outings to glamorous events. Their sleek, metallic shine has made them a favorite among beauty enthusiasts, and the best part? You can achieve this salon-quality look at home with the right tools and techniques. This comprehensive, beginner-friendly DIY chrome nails tutorial guides you through every step, from preparation to finishing touches, with expert tips, product recommendations, and troubleshooting advice to ensure a flawless manicure. Let’s get started and make your nails shine like never before!
What Are Chrome Nails?
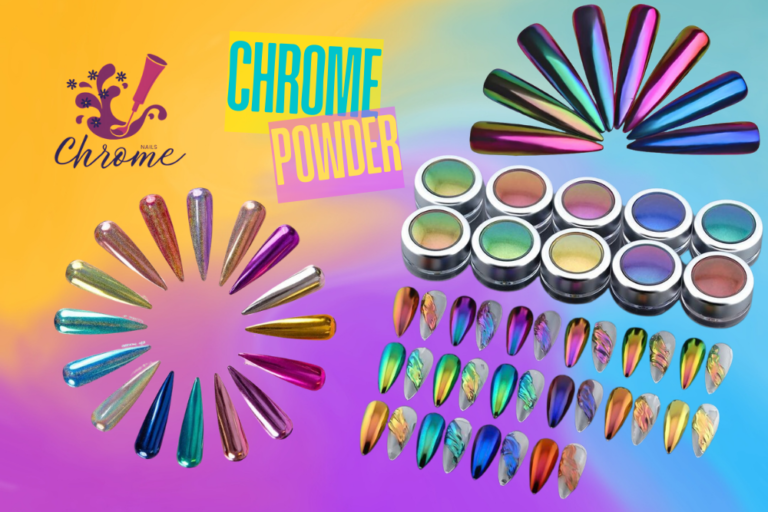
Chrome nails are a high-impact nail trend characterized by a reflective, metallic finish that resembles a polished mirror. Unlike traditional glitter or metallic polishes, chrome nails use a special chrome powder applied over gel polish to create a smooth, glossy surface that catches the light from every angle. Available in a variety of shades—such as silver, gold, rose gold, holographic, and even vibrant colors like pink or blue—chrome nails offer endless versatility.
To learn more about the magic behind this trend, check out our detailed guide on What Is Chrome Powder? for insights into the product that makes this look possible.
Why Choose Chrome Nails?
Chrome nails stand out for several reasons:
- Bold Aesthetic: Their reflective finish adds instant glamour, making them ideal for special events or everyday chic.
- Versatility: Chrome powder works with any base color, allowing for endless design possibilities, from subtle to bold.
- Durability: When applied correctly, chrome nails can last 2–3 weeks with minimal chipping.
- DIY-Friendly: With affordable kits and accessible tools, anyone can master chrome nails at home.
Whether you’re inspired by celebrity looks like those in our Zendaya’s Olympics Manicure post or want a unique twist like Pink Chrome Nail Ideas, this tutorial will help you achieve professional results.
Tools and Materials You’ll Need
To create chrome nails at home, gather these essential tools and materials. Investing in quality products ensures a smoother application and longer-lasting results:
- Nail File and Buffer: Shape nails and smooth the surface for better polish adhesion.
- Cuticle Pusher and Trimmer: Prep nail beds for a clean, professional look.
- Base Coat Gel Polish: Provides a foundation for gel polish and chrome powder.
- Gel Polish (Color of Choice): Choose a color that enhances your chrome powder (e.g., black for silver chrome, nude for pearl chrome).
- No-Wipe Top Coat: A non-sticky top coat is essential for a flawless chrome finish.
- Chrome Nail Powder: Available in classic metallic shades (silver, gold) or vibrant options (holographic, rose gold).
- Applicator Sponge or Silicone Brush: For applying and buffing chrome powder.
- UV/LED Lamp: Cures gel polish layers for durability (36W or higher recommended).
- Isopropyl Alcohol (91% or higher): Removes oils and residue from nails.
- Lint-Free Wipes: Ensures a clean surface without leaving fibers.
- Top Coat (Regular or Gel): Seals the chrome finish for protection.
- Nail Cleanser or Rubbing Alcohol: Cleans nails post-application for maximum shine.
- Cuticle Oil: Hydrates cuticles and enhances the final look.
- Optional: Nail art brushes or stencils for adding designs to your chrome nails.
Pro Tip: Consider purchasing a chrome nail kit, which bundles compatible products like chrome powder, gel polish, and applicators for convenience. Popular kits range from $15–$30 and are perfect for beginners.
Step-by-Step Tutorial for DIY Chrome Nails
Follow these detailed steps to create stunning chrome nails at home. Each step is designed to ensure a professional finish, even if you’re new to nail art.
Step 1: Nail Preparation
Proper prep is the foundation of a long-lasting manicure.
- Clean Your Hands: Wash your hands with soap and water to remove dirt and oils. Dry thoroughly.
- Shape Your Nails: Use a nail file to shape your nails into your desired style, such as almond, square, or coffin. For inspiration, see our Almond Nail Designs guide.
- Buff the Surface: Gently buff the nail surface with a fine-grit buffer to remove shine and improve polish adhesion. Avoid over-buffing to prevent thinning.
- Push Back Cuticles: Use a cuticle pusher to gently push back cuticles. Trim excess skin with a cuticle trimmer for a clean nail bed.
- Cleanse Nails: Wipe each nail with a lint-free wipe soaked in 91% isopropyl alcohol to remove oils, dust, or residue.
Step 2: Apply Gel Base Coat
- Brush on Base Coat: Apply a thin, even layer of gel base coat, avoiding the cuticles and skin. Ensure full coverage of the nail.
- Cure Under UV/LED Lamp: Place your nails under a UV/LED lamp and cure for 30–60 seconds (check your lamp’s manual for exact timing).
- Check for Stickiness: Some base coats leave a sticky residue after curing. If present, wipe it off with a lint-free wipe and isopropyl alcohol.
Step 3: Apply Gel Color Polish
- Select a Base Color: Choose a gel polish that complements your chrome powder. For example, black enhances silver chrome, while nude pairs well with pearl chrome. Explore color ideas in our Pink Chrome Nail Ideas post.
- Apply First Layer: Brush on a thin layer of gel polish, ensuring even coverage. Avoid pooling near the cuticles.
- Cure the Layer: Cure for 60 seconds under the UV/LED lamp.
- Apply Second Layer: Add a second thin layer for opacity and cure again for 60 seconds. Thin layers prevent bubbling or uneven texture.
Step 4: Apply No-Wipe Top Coat
- Brush on No-Wipe Top Coat: Apply a thin, smooth layer of no-wipe top coat, which leaves no sticky residue after curing. This is critical for chrome powder adhesion.
- Cure Thoroughly: Cure for 60 seconds under the UV/LED lamp. Ensure the surface is completely dry and smooth.
- Inspect the Surface: Check for any uneven spots. If needed, apply another thin layer and cure again.
Step 5: Apply Chrome Powder
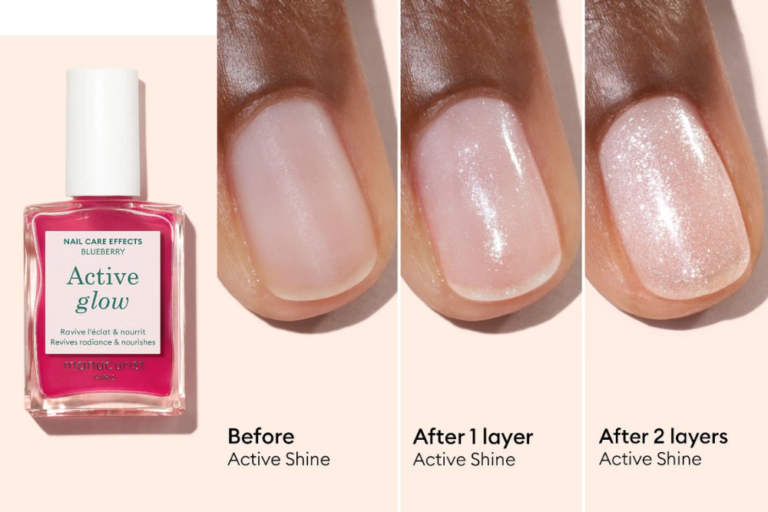
- Prepare the Powder: Scoop a small amount of chrome powder onto your applicator sponge or silicone brush. A little goes a long way!
- Rub On the Powder: Gently rub the chrome powder onto the cured top coat in small, circular motions. Apply even pressure to achieve a uniform, mirror-like finish.
- Buff for Maximum Shine: Continue buffing until the nail reflects light like a mirror. Focus on edges and corners for complete coverage.
- Remove Excess Powder: Use a clean, soft brush to dust off excess powder from the nail and surrounding skin.
Step 6: Seal the Chrome Finish
- Apply Final Top Coat: Brush on a thin layer of regular or gel top coat to protect the chrome finish. Be gentle to avoid smudging the powder.
- Cure (if using gel): Cure for 60 seconds under the UV/LED lamp.
- Cleanse Nails: Wipe nails with a nail cleanser or isopropyl alcohol using a lint-free wipe to remove any residue and enhance the shine.
Step 7: Finishing Touches
- Moisturize Cuticles: Apply cuticle oil to hydrate the nail beds and add a polished look.
- Inspect and Touch Up: Check for any imperfections, such as uneven chrome or smudges, and fix with additional powder or top coat if needed.
- Add Optional Designs: For a creative twist, use nail art brushes or stencils to add accents like glitter tips or geometric patterns. See our Chrome French Tip Nails Ideas for inspiration.
- Showcase Your Nails: Snap a photo of your chrome nails and share them on Instagram with #ChromeNails to join our community!
Troubleshooting Common Chrome Nail Issues
Even with careful application, you may encounter issues. Here’s how to address common problems:
- Patchy or Uneven Chrome Finish: Ensure the no-wipe top coat is applied thinly and cured fully. Reapply and cure the top coat if the surface feels uneven before adding chrome powder.
- Powder Not Sticking: Use a no-wipe top coat, as sticky top coats prevent adhesion. Verify that the top coat is fully cured and not tacky to the touch.
- Dull or Cloudy Shine: Buff the chrome powder thoroughly with light pressure. Use high-quality powder, as low-grade options may lack vibrancy. Try brands like Modelones for consistent results.
- Chipping or Peeling: Apply thin layers of gel polish and cure each layer completely. Use a durable top coat, and avoid soaking nails in water for long periods.
- Uneven Color Base: Ensure the gel polish is opaque with two thin layers. Match the base color to the chrome powder for best results (e.g., dark blue under holographic chrome).
- Powder Smudging During Top Coat Application: Apply the final top coat with a light touch and avoid brushing over the same spot multiple times.
- Nail Damage or Weakness: Avoid over-buffing during prep, and use cuticle oil daily to maintain nail health. Take breaks between gel manicures to let nails recover.
For more on chrome powder application, refer to our What Is Chrome Powder? guide.
Top Product Recommendations for Chrome Nails
Choosing the right products is key to a flawless chrome manicure. Below are top-rated, beginner-friendly options, with price ranges based on common retailers (as of June 2025):
- Beetles Gel Polish Chrome Nail Kit (~$15–$25): Includes gel base, top coat, silver chrome powder, and applicators. Perfect for beginners with clear instructions.
- Modelones Chrome Powder Set (~$10–$18): Offers six shades (silver, gold, rose gold, holographic, etc.) with a silicone brush for precise application.
- AIMEILI No-Wipe Top Coat (~$8–$12): Delivers a glossy, non-sticky finish ideal for chrome powder adhesion.
- MelodySusie Portable UV/LED Lamp (~$20–$35): A 36W lamp with adjustable settings for fast, even curing.
- Saviland Cuticle Oil Pen (~$5–$10): A convenient pen applicator with nourishing oils to hydrate cuticles post-manicure.
- Gellen Gel Polish Starter Kit (~$25–$40): Includes multiple gel polish colors, base, and top coats for experimenting with chrome base colors.
- Born Pretty Holographic Chrome Powder (~$8–$15): A vibrant, budget-friendly powder for bold, iridescent looks.
Eco-Friendly Option: Look for vegan and cruelty-free brands like Zoya or Ella+Mila for sustainable chrome nail products. Check product labels for “10-free” formulas to avoid harmful chemicals.
Shopping Tip: Purchase from trusted retailers like Amazon, Ulta, or Sally Beauty, and read reviews to ensure product quality. For eco-conscious readers, explore our upcoming post on Eco-Friendly Chrome Nail Products for sustainable options.
Chrome Nail Inspiration Gallery
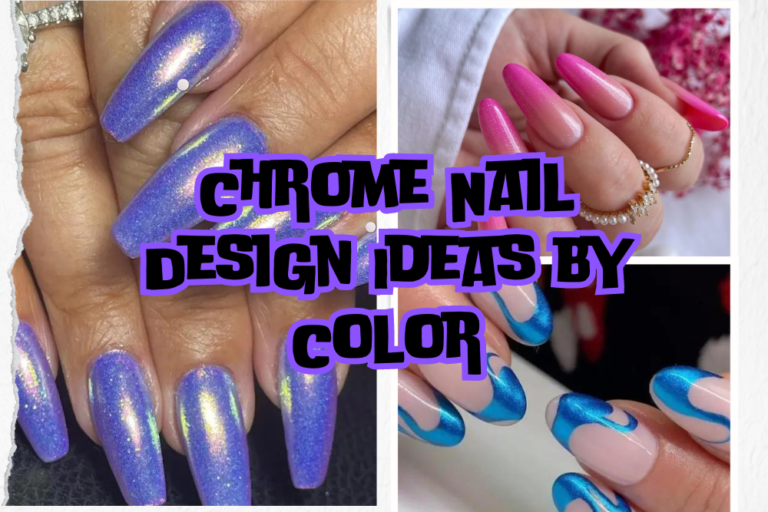
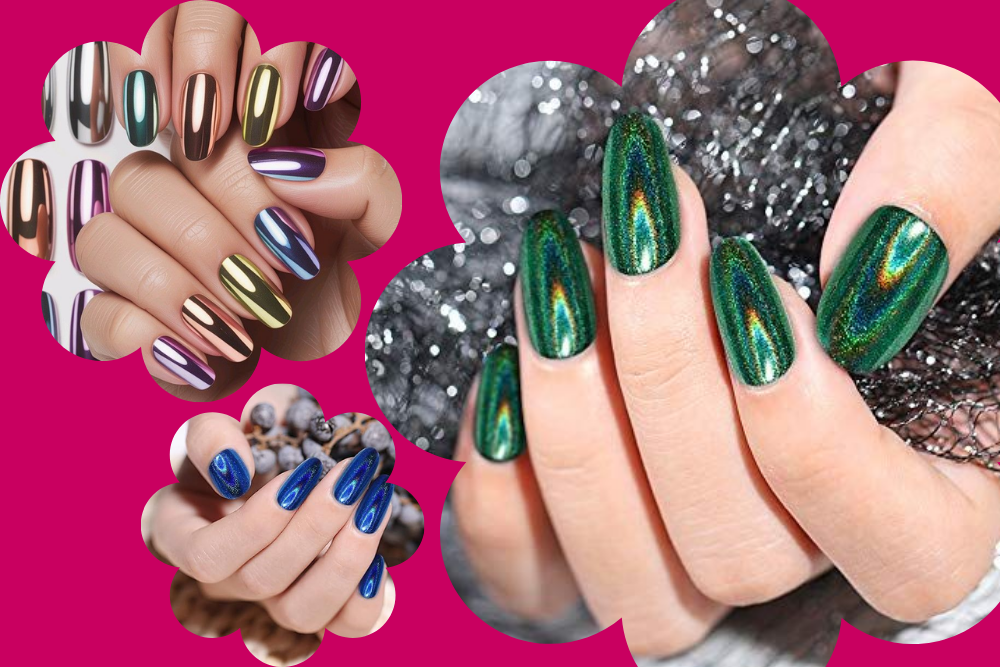
Need some visual inspiration? Here are a few chrome nail ideas to spark your creativity:
- Silver Chrome on Black Base: A bold, futuristic look perfect for evening events. Pair with a matte top coat for contrast.
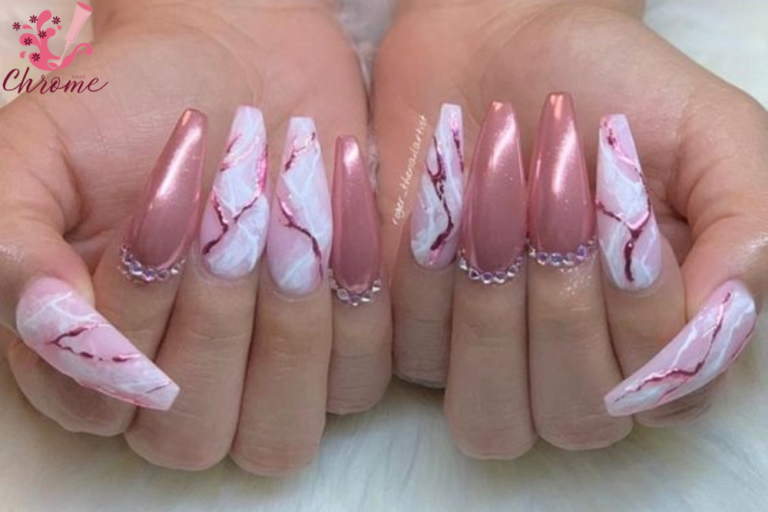
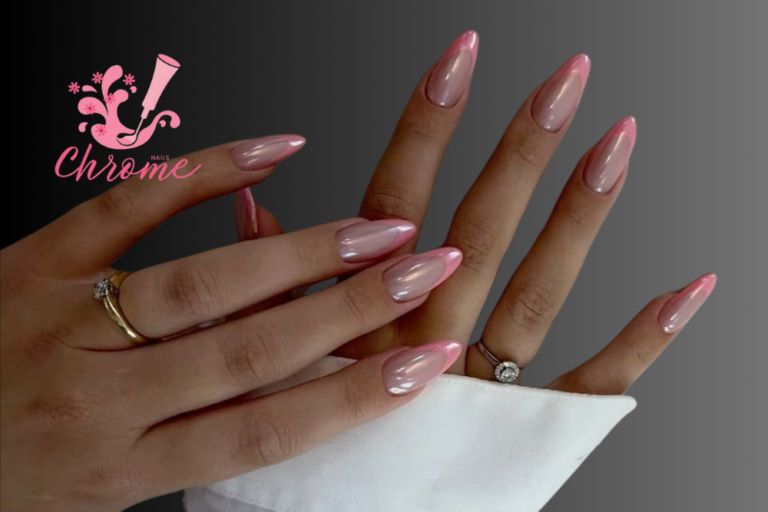
- Rose Gold Chrome on Nude Base: A soft, elegant style ideal for weddings or daily wear. See our Rose Gold Chrome Nails post.
- Holographic Chrome on Navy Base: A vibrant, multi-dimensional look that shines in sunlight. Check out our Holographic Chrome Nails Guide.
- Gold Chrome French Tips: A modern twist on the classic French manicure. Explore more in our Chrome French Tip Nails Ideas.
Pro Tip: Save these ideas to your Pinterest board or share your own chrome nail creations with us using #ChromeNails!
Maintenance Tips for Long-Lasting Chrome Nails
To keep your chrome nails looking flawless for 2–3 weeks, follow these maintenance tips:
- Protect Your Nails: Wear gloves when washing dishes or using cleaning products to prevent chipping.
- Apply Cuticle Oil Daily: Hydrate cuticles and nail beds to maintain flexibility and shine.
- Avoid Harsh Chemicals: Steer clear of acetone-based products (except during removal) and hand sanitizers, which can dull the chrome finish.
- Touch Up Minor Chips: If a chip occurs, apply a thin layer of top coat and cure to seal it.
- Moisturize Hands Regularly: Use a hand cream to keep skin soft and complement your manicure’s polished look.
- Schedule Breaks: Give your nails a break from gel polish every 6–8 weeks to prevent weakening.
For more maintenance advice, stay tuned for our upcoming post on Chrome Nail Care Tips.
FAQs About DIY Chrome Nails
Can I Do Chrome Nails Without a UV/LED Lamp?
No, a UV/LED lamp is necessary to cure gel polish, which provides the smooth surface needed for chrome powder adhesion. Regular nail polish lacks the durability and tack-free finish required for chrome nails.
How Long Do Chrome Nails Last?
With proper application and care, chrome nails last 2–3 weeks. Use a high-quality top coat and follow maintenance tips to extend wear.
What’s the Best Chrome Powder for Beginners?
Beetles and Modelones chrome powders are beginner-friendly due to their fine texture and easy application. Silver and gold shades are versatile starting points.
Why Is My Chrome Finish Patchy?
Patchiness often results from an uneven or under-cured no-wipe top coat. Apply a thin, even layer and cure fully (60 seconds) before adding powder.
Can I Use Regular Nail Polish for Chrome Nails?
Regular polish doesn’t work well, as chrome powder requires a gel base for adhesion and shine. Stick to gel polish for professional results.
How Do I Remove Chrome Nails Safely?
Soak cotton pads in acetone, place them on your nails, and wrap with foil for 10–15 minutes. Gently scrape off the polish and hydrate with cuticle oil. Look out for our upcoming post on Chrome Nail Removal for a detailed guide.
Are Chrome Nails Safe for My Natural Nails?
Yes, when applied and removed correctly, chrome nails are safe. Avoid over-buffing and use cuticle oil to maintain nail health.
Can I Add Nail Art to Chrome Nails?
Absolutely! Add glitter, rhinestones, or French tips for extra flair. Check out our Dazzling Chrome Nail Designs for more ideas.
Conclusion
Mastering DIY chrome nails at home is easier than ever with this step-by-step tutorial. From prepping your nails to applying the perfect chrome powder, you now have the tools and knowledge to create a stunning, mirror-like manicure that rivals salon results. Experiment with colors like silver, gold, or even vibrant hues from our Pink Chrome Nail Ideas or Gold Chrome Nails Inspirations to make the look your own.